A Beginner's Guide to Open Source Contribution

Have you ever wanted to contribute to open source but didn't know where to start? In this article, we'll go over the basics of how to get started with contributing to open source projects.
My assumptions
I'm assuming that you have some basic knowledge of programming and that you know how to use Git. If not, there are plenty of resources online that can help you learn these skills.
I'm also assuming that you know what open source is and why it's
important. In this article, we'll be focusing on the HOW.
1. Pick a project that interests you
The first step is to find a project that interests you. There are many different types of projects out there, so it's important to find one that you're passionate about.
Also make sure that the project is active and has a good community around it. You don't want to spend time contributing to a project that no one cares about.
Here are some tips for finding projects:
- It's a topic you're interested in
- It uses technologies you're familiar with
- It has a good community around it
- It's active and has recent commits
In this example, we'll be using QueryMaster project as our example project. It is a database management tool for SQL.
2. Read the contribution guidelines
Once you've found a project that interests you, MAKE SURE you read their guidelines if they have any. This will help you avoid wasting time on things that aren't allowed or won't be accepted.
3. Find an issue to work on
Now that you've found a project that interests you and read their guidelines, it's time to find an issue to work on. This is where most people get stuck because they don't know how to find issues that are good for beginners.
Here are some tips for finding issues:
- Look for issues that are labeled
good first issueorbeginner friendly - Look for issues that are labeled
help wantedorhelp needed - Look for issues that are labeled
easyorlow hanging fruit - Look for issues that you have experience with
- Or just ask the maintainers for suggestions

This is an example of a good first issue from QueryMaster. It's
labeled good first issue and has a description of what needs to
be done. It also has a simple guide of how this issue can be
solved and where to start.
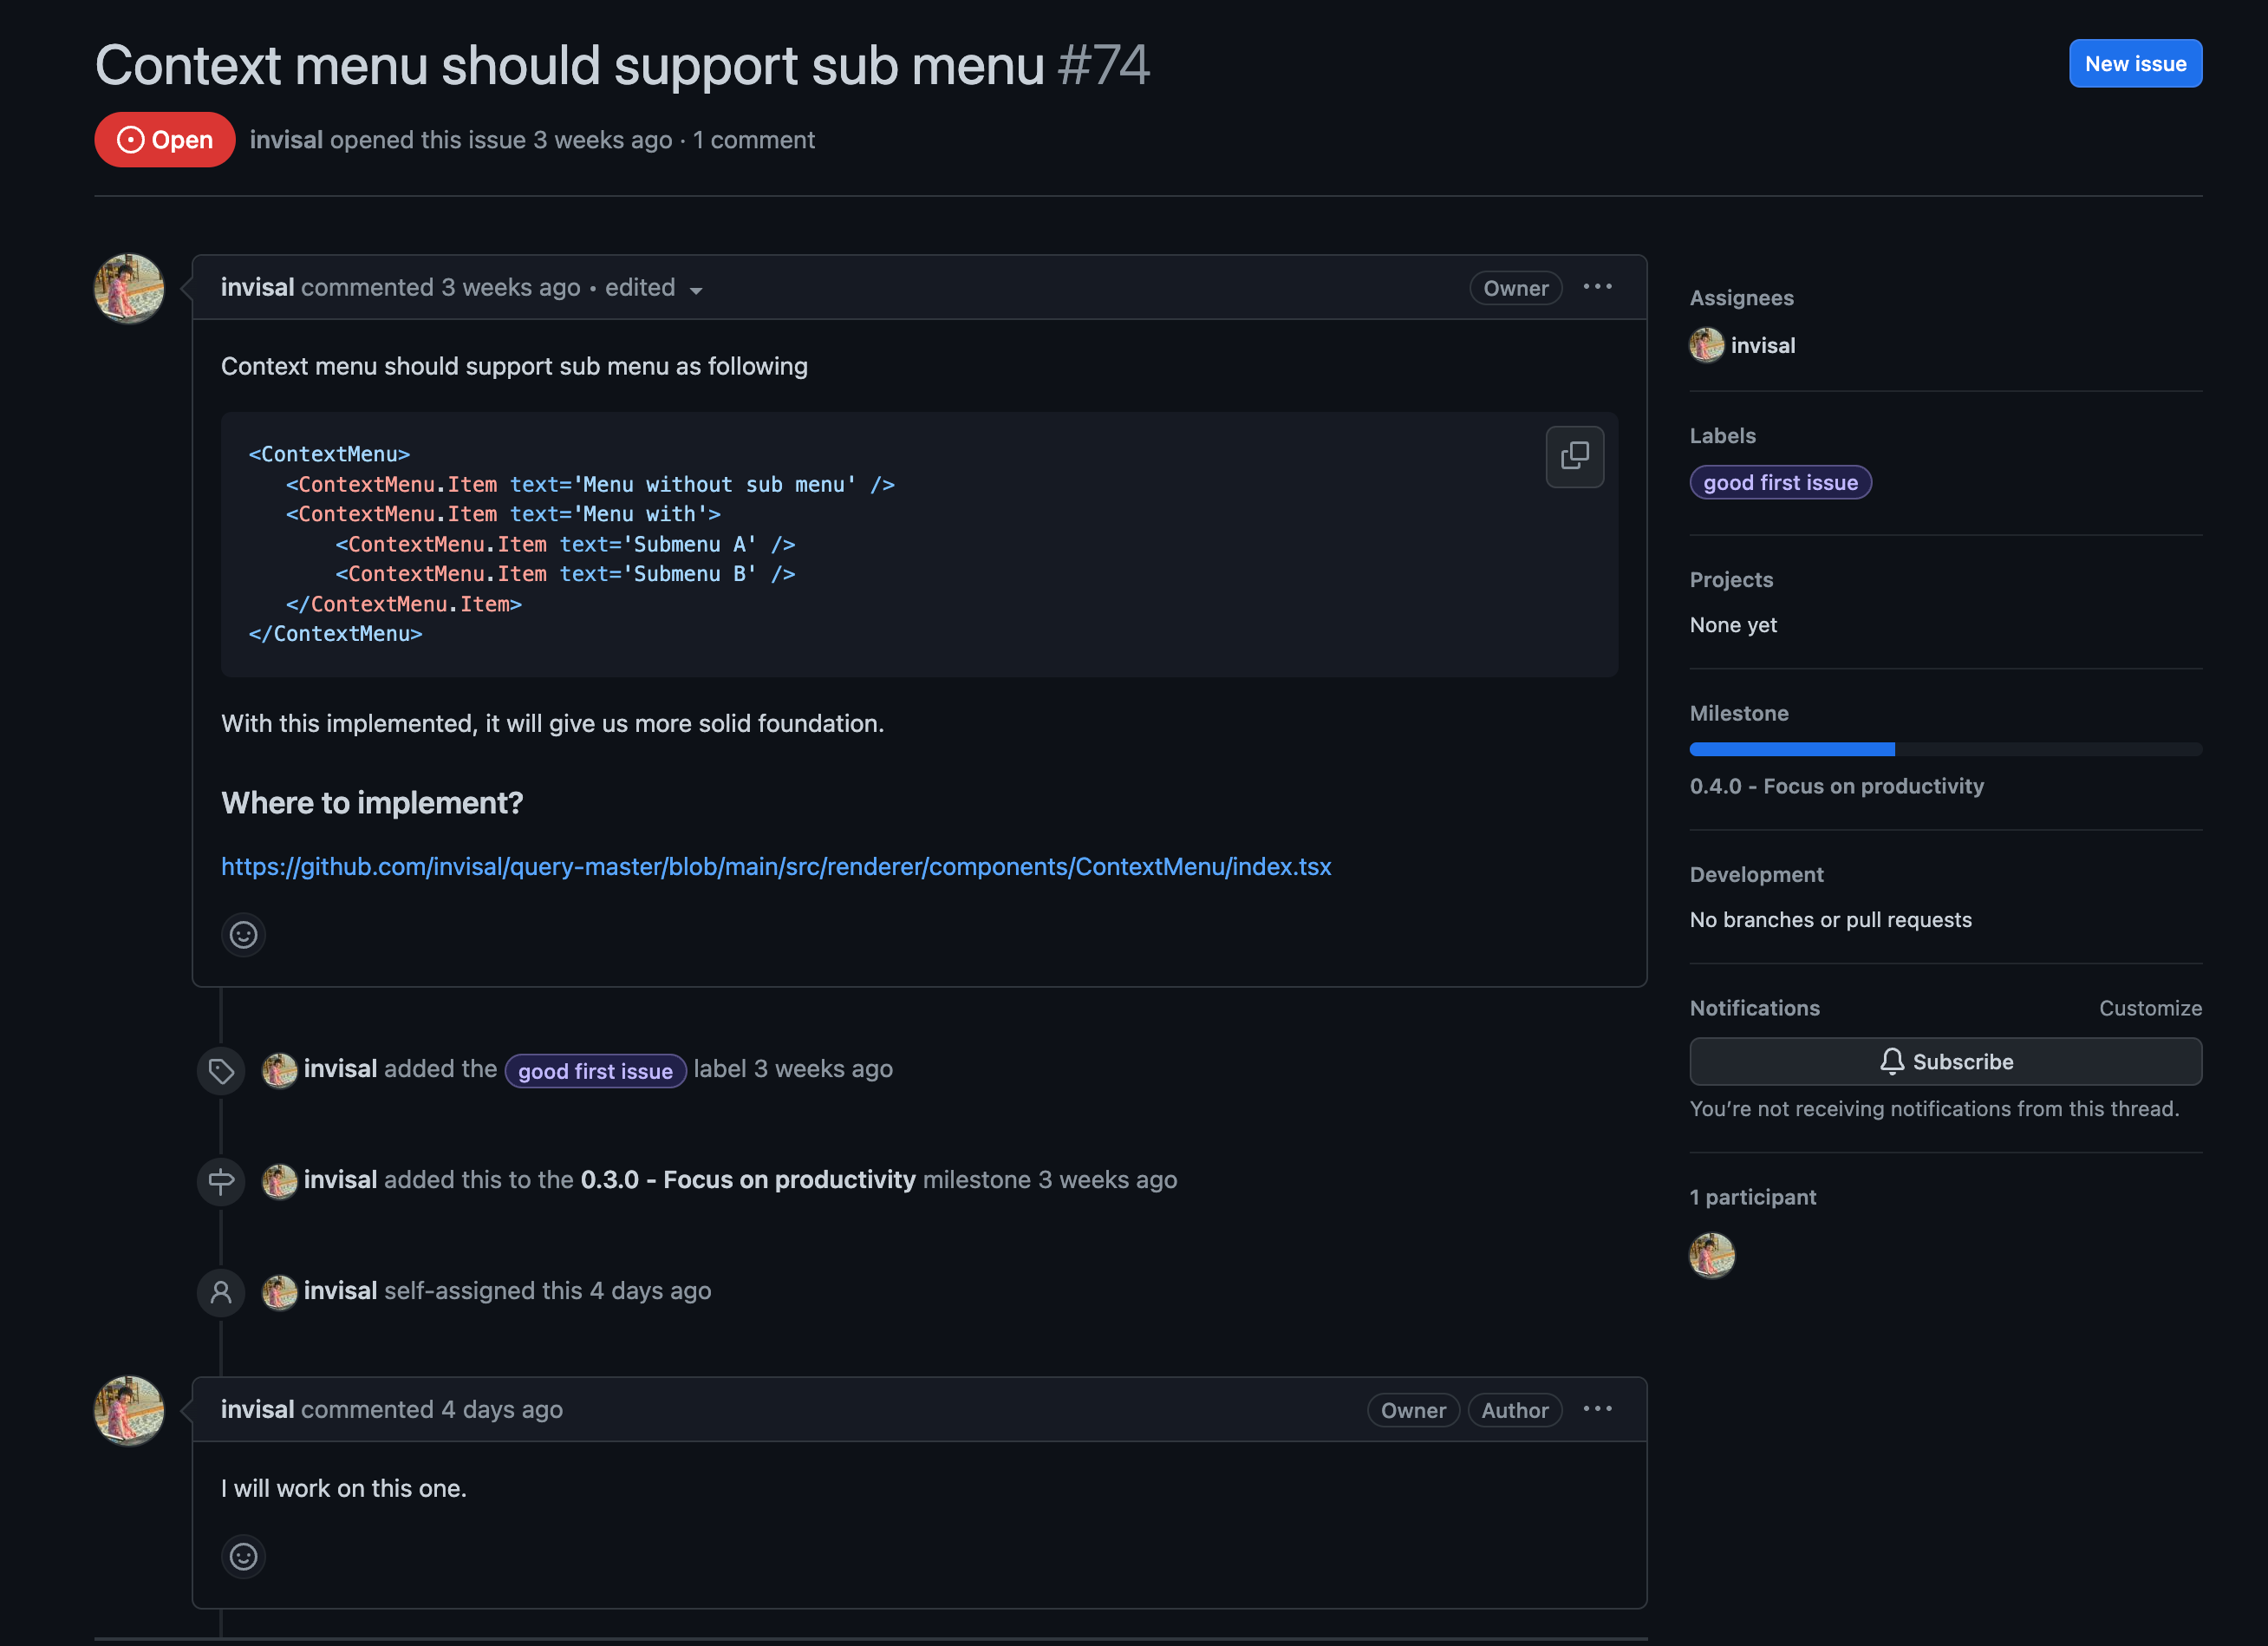
But sadly, Bong Visal already said that he will work on this issue. 😂
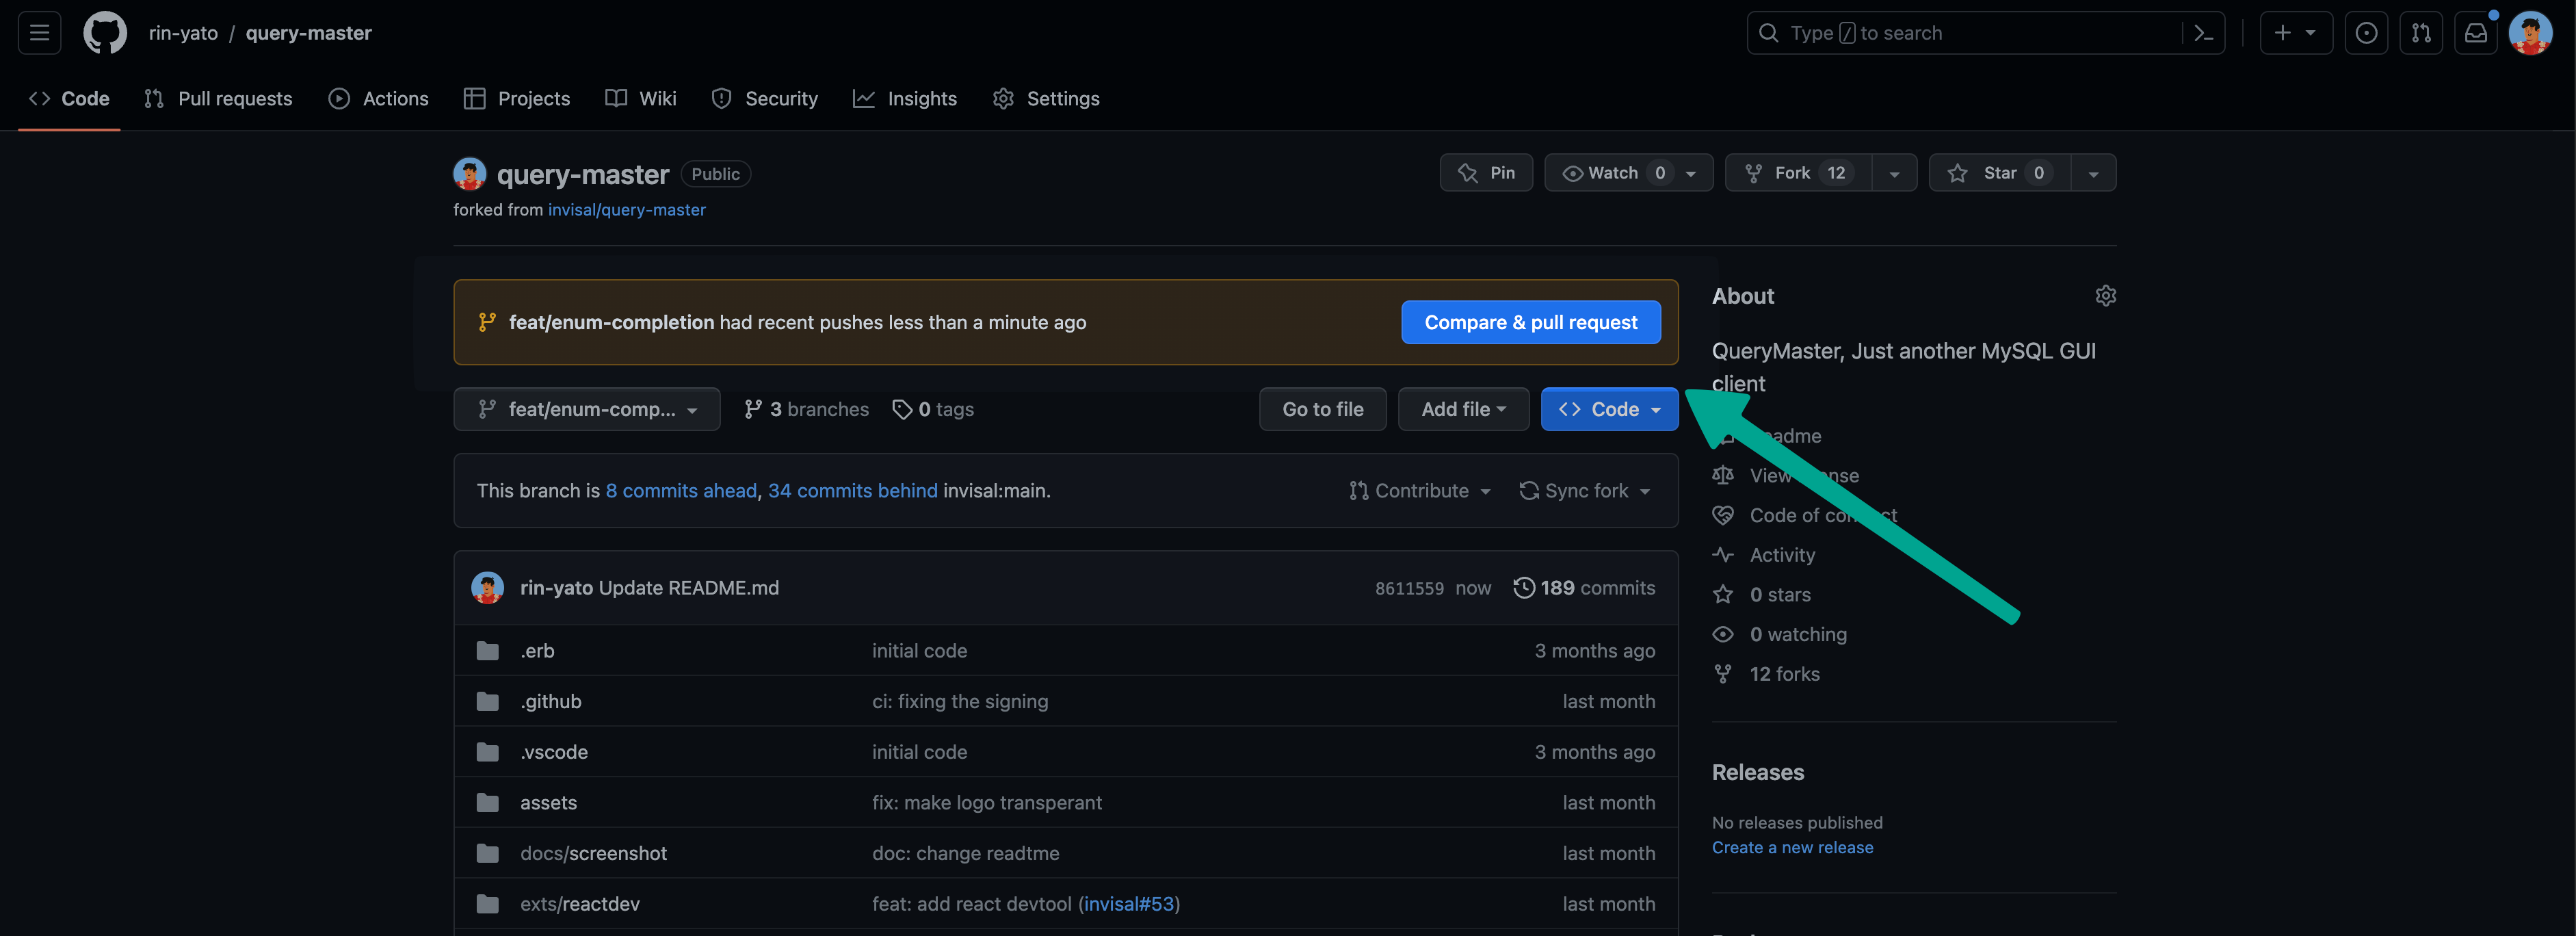
4. Fork the repository
Once you've found an issue to work on, it's time to fork the repository. This will create a copy of the project in your own account so that you can make changes without affecting the original project.
To fork a repository, click on the Fork button in the top right
corner of the repository page.

5. Clone the repository
Now that you've forked the repository, it's time to clone it to your local machine. This will allow you to make changes and test them out before submitting a pull request.
Make sure you clone the repository from your own account and not
the original project!
6. Create a new branch
Once you've cloned the repository, it's time to create a new branch for your changes. This will allow you to work on multiple issues at the same time without affecting each other.
Some projects have specific naming conventions for branches, so make sure you read their guidelines before creating a new branch.
To create a new branch, run the following command:
git branch "branch-name"

# For example:
git branch feat/context-menuTo switch to your new branch, run the following command:
git checkout "branch-name"

# For example:
git checkout feat/context-menu7. Make your changes
Now that you've created a new branch, it's time to make your changes. One thing you must not forget is that you can ask the maintainers for help if you get stuck or have any questions. Or if you just don't know where to start, you can ask them for help.
You can also refer to the guide that was posted with the issue for more information on how to solve it.
8. Commit your changes
Once you've made your changes, it's time to commit them. This will save your changes to your local repository so that you can push them to GitHub later on.
Make sure you write a good and short commit message that explains what you did and why you did it. This will help the maintainers understand your changes and why they were made. This will make the maintainers happy. 😂
To commit your changes, run the following command:
# Don't forget to add the
# files you want to commit
git add .

git commit -m "commit message"

# For example:
git commit -m "feat: added context menu"9. Push your changes
How do I even explain this? 😂
Let's push the changes to the FORKED repository.
git push origin "branch-name"10. Create a pull request
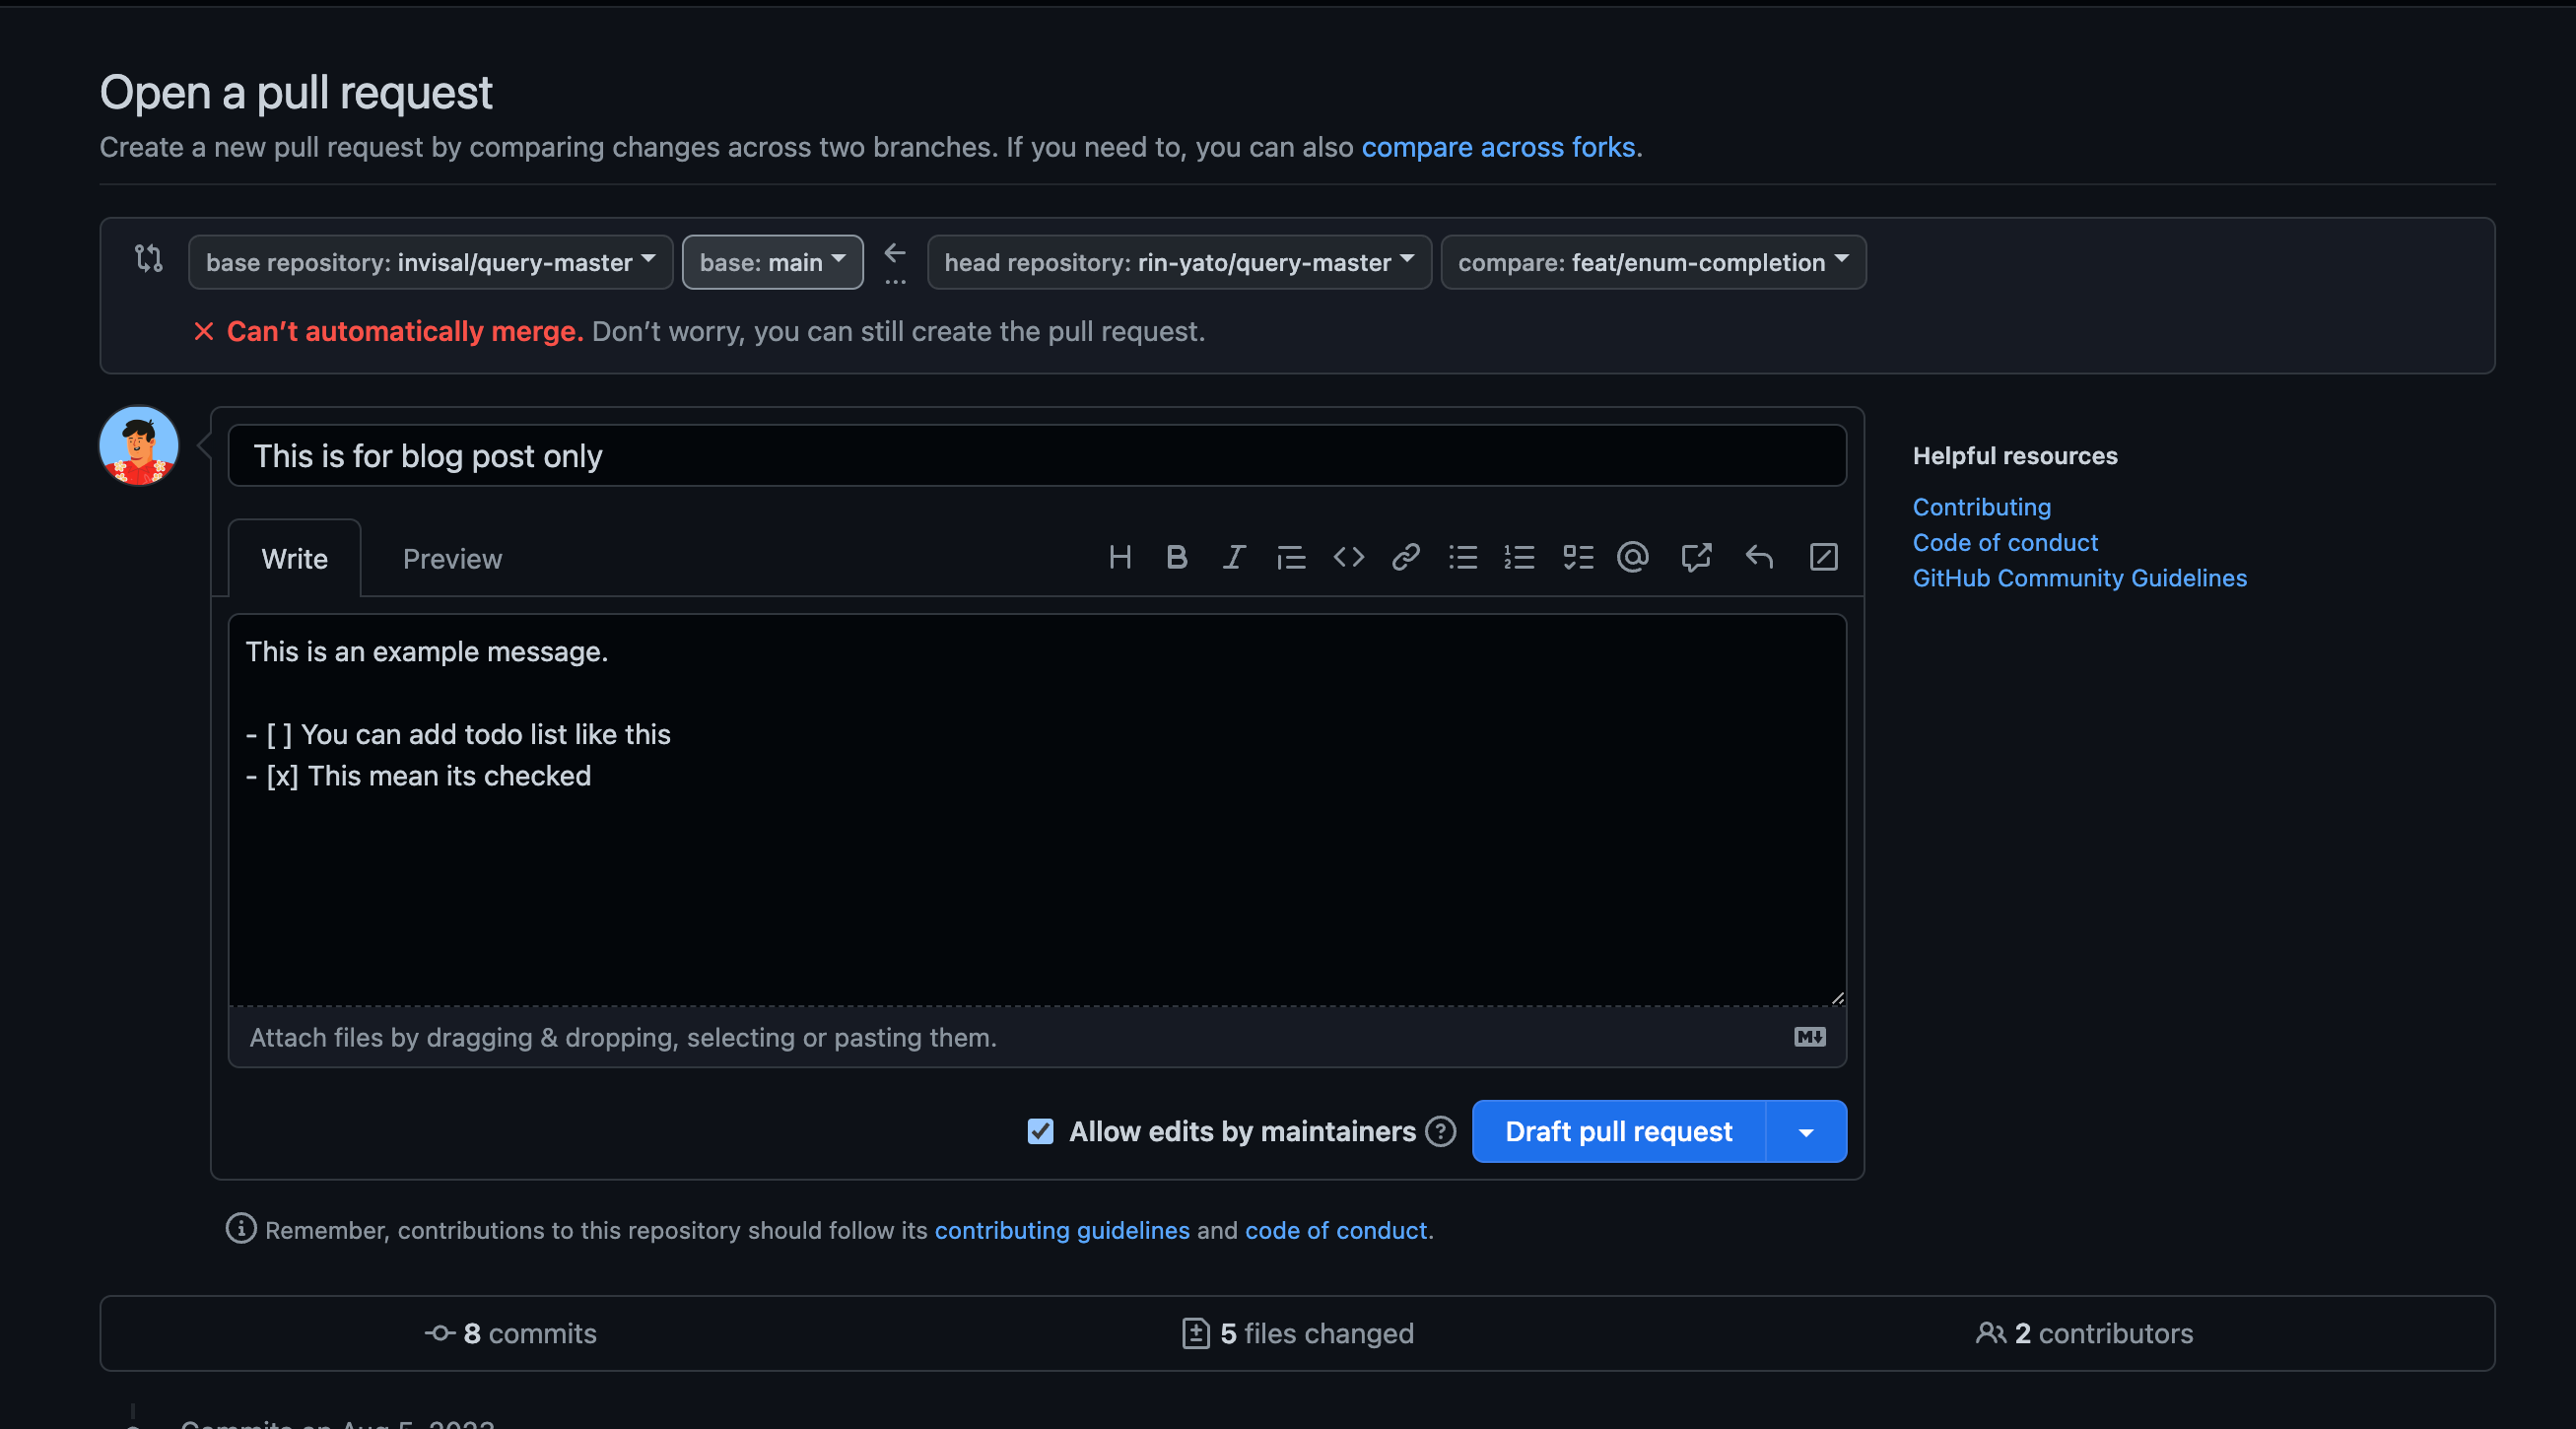
Now that you've pushed your changes to your forked repository, it's time to create a pull request. This will allow the maintainers to review your changes and merge them into the original project if they're good enough.
Make sure you write a good and short description of your changes and why they were made. This will help the maintainers understand your changes and why they were made.
I know I said this before, but I'll say it again, because it's easier to read the pull request description than to read the commit messages.😂
To create a pull request, click on the Compare & pull request
button. It should look something like this
Now it will take you to the pull request page. Here you can write a good and short description of your changes and why they were made.
11. Wait for feedback
Now that you've created a pull request, it's time to wait for feedback. The maintainers will review your changes and give you feedback on them. If they're good enough, they'll merge them into the original project.
If they're not good enough, they'll give you feedback on how to improve them. You can then make the necessary changes and push them to the same branch. This will update your pull request with the new changes.
12. Celebrate
Now that you've made your first contribution to an open source project, You can now go and brag about it to your friends. 😂
Conclusion
I hope this article helped you understand how to contribute to open source projects. If you have any questions or feedback, feel free to leave a comment in my facebook's post, since I don't have comment here. 😂 Alrightyy, see you in the next article. Bye bye 👋🍀